
Hope everyone is recovering from last week’s election, but is also ready to put in the work we still need to do!
I was hoping to give you and update on my NaNoWriSweMo progress, but there hasn’t been much. Turns out existential dread is a poor environment for writing (fiction). My Dissent sweater provided a little bit of distraction, but after a while, I couldn’t even motivate myself to work on that. I needed something quick and satisfying to really do the job.
Enter the Bettie Harness(Ravelry link)! I fell in love with the tester’s projects over the summer on Instagram. Sure, some of them were NSFW, but a lot of them were styled over dresses and shirts to amazing results. I have that linen dress that I made that just didn’t fit me right anymore. I figured one of these would help and look better than just a belt.
Here was my initial problem, though: I abhor making I-cords. I will do anything possible to avoid making them. This is not conducive to a project that is only i-cord, just feet and feet of i-cord.
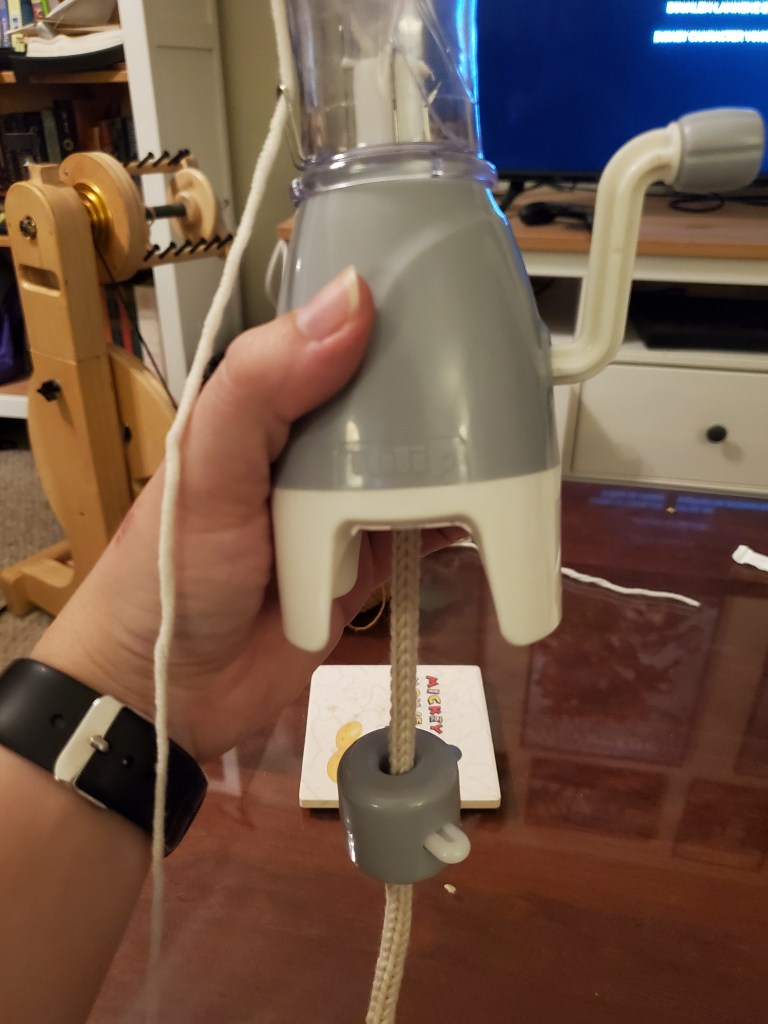
Enter the Tulip I-cord machine! At first, I thought this was the most clever solution. Then I actually attempted to use it. At first, all I was getting was tangled messes stuck in the hooks. Right when I was about to give up and throw the whole thing out, I decided to look at some videos of it in action. It took until the official Tulip video (which is in Japanese) to see where I messed up:

Turns out, there is a required set-up: Catch, skip the next hook by using the crochet hook to get the yarn out, catch, skip the next hook, catch. That “stitch” will go in the first “stitch” allowing a setup that will catch the weight underneath. Once I figured that out, it was pretty smooth sailing.
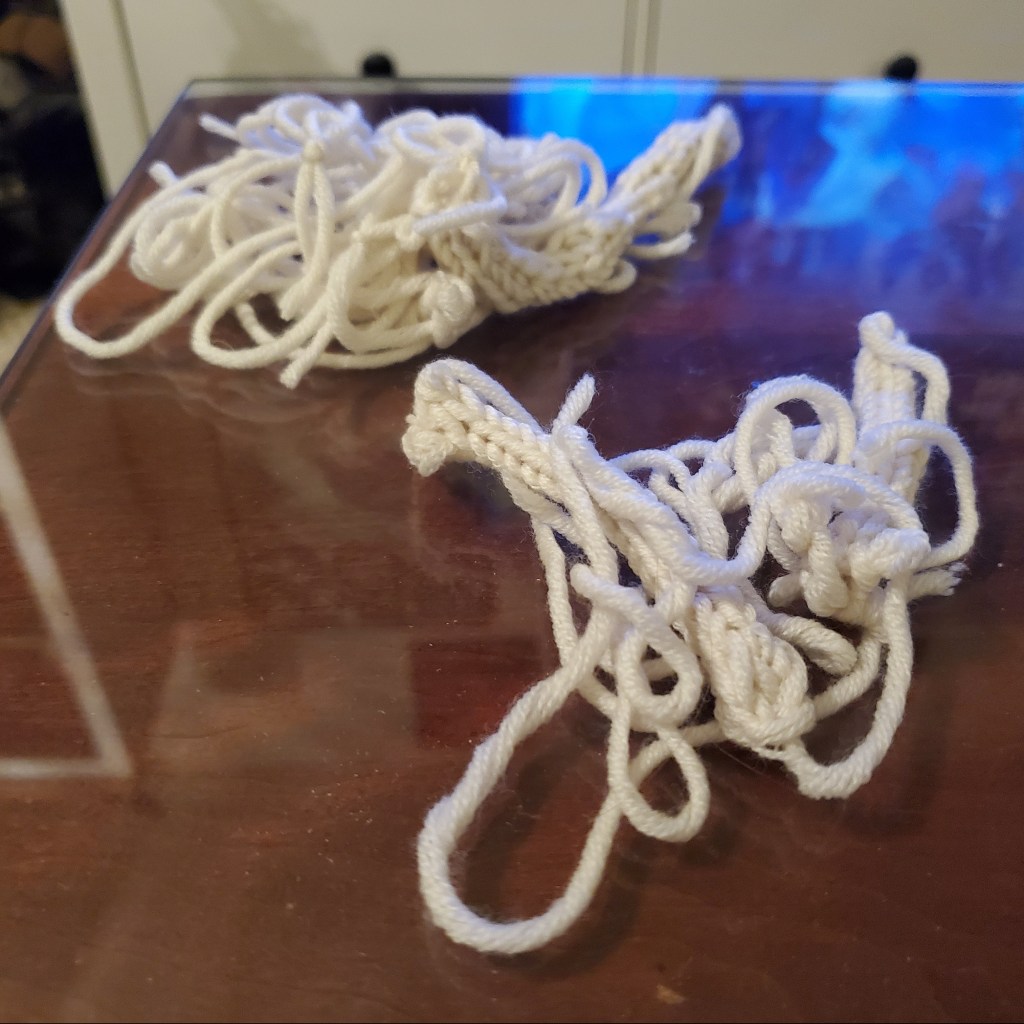
The other thing to be wary of is the amount of extra waste you have, so be careful using some limited, special yarn. Sure, I made some mistakes, and that’s a bit of this, but you need a long length of yarn at the beginning to accommodate the weight. For a project like this, where you’re looking for exact lengths, you need to knit past that point and rip back. Same for if I mess up and make the second length shorter than the matching first. It’s a lot of long ends.
You also need to be wary of the type of yarn you’re using: nothing thicker than a worsted and nothing really splitty. I had some trouble on both fronts with this white scrap yarn, but when I got to the intended DK yarn, I could bust out a harness in less time than it took me to watch a blockbuster movie. Not to mention, it was really fun to crank, crank, crank, and then boom: i-cord.

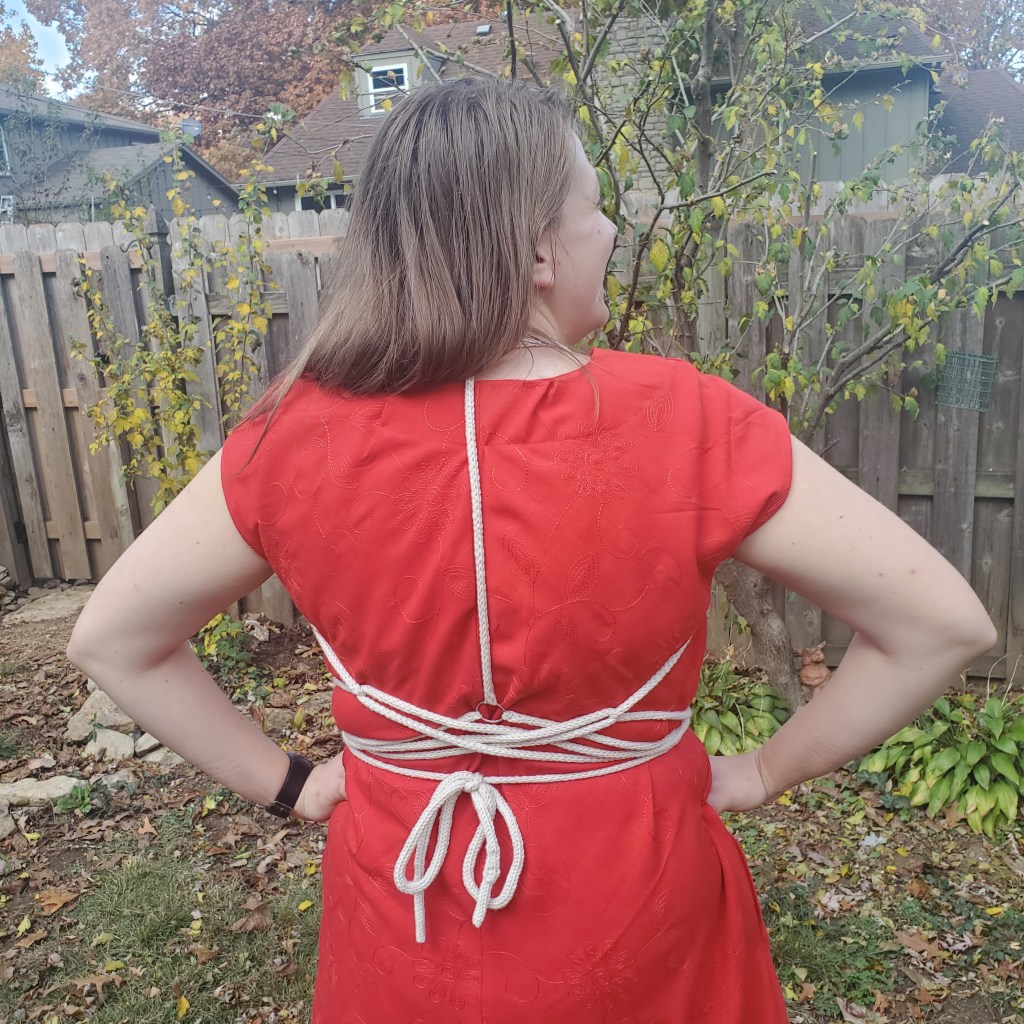
And look at it with the dress!! I’m very happy with it, and currently looking for other things I can do with a bunch of i-cords.

Be careful not to get tangled up 😉
LikeLiked by 1 person